Chat Assistant Setup with Ollama, LiteLLM, and Google ADK
With so many choices for building chat assistants, sometimes you just want to keep everything local and have control over each component. In this guide, I will walk through how to set up a chat assistant using Ollama, LiteLLM, and Google’s Agent Development Kit (ADK). With this setup, everything runs locally without calling to any external APIs.
Project structure
Here is the project structure we will use:
local-chat-assistant/
├── ollama/                  # Ollama container setup
│   └── compose.yaml
├── litellm/                 # LiteLLM Proxy setup, TBD
├── adk/                     # Google ADK
│   ├── compose.yaml         # ADK container setup, TBD
│   ├── requirements.txt
│   └── chat_agent/          # Chat agent package
│       ├── __init__.py
│       └── agent.py         # Main agent code
Ollama setup
There are many ways to install/run Ollama. We can install and run it on a host directly, but cleaning up or uninstalling Ollama is not straightforward. Therefore, I perfer running Ollama in a container. Here is a quick docker compose file to run Ollama in a container:
# ollama/compose.yaml
services:
  ollama:
    image: ollama/ollama:latest
    ports:
      - 11434:11434
    volumes:
      - ./models:/models
    environment:
      - OLLAMA_MODELS=/models
    restart: always
    deploy:
      resources:
        reservations:
          devices:
            - driver: nvidia
              count: 1
              capabilities: [gpu]
Note that the deploy section is optional allow the container to use the GPU of the host machine. If you do not have a GPU or do not want to use it, remove this section.
In the volumes section, we mount a local models directory (under ollama)
to the /models directory in the container. This is where Ollama will store
downloaded models. We also set the OLLAMA_MODELS environment variable to
tell Ollama where to store the models.
With this compose.yaml file, we can start our Ollama container with (make
sure you are in the ollama directory):
docker compose up -d
Now after the container is running run
docker container list
to find the container ID of the Ollama container. Use this id to run a model with ollama:
docker exec -it <container_id> ollama run gemma3:4b-it-q4_K_M "Hello."
Here I am using the gemma3:4b-it-q4_K_M model, which is a quantized version
of the Gemma 3 4B multimodal model. I am using the quantized version since
my local GPU has only 8GB of memory. For more information on the Gemma 3
models see here.
The last part of the command is optional. I put it there just to prevent the model from entering interactive mode.
LiteLLM setup
LiteLLM supports Ollama out of the box, and we can simply call the Ollama model that we just deployed with
from litellm import completion

response = completion(
    model='ollama/gemma3:4b-it-q4_K_M',
    messages=[{ 'content': 'Hello!', 'role': 'user'}],
    api_base='http://localhost:11434',
)
However, we are using ADK for the chat assistant, so we won’t be using LiteLLM directly.
We can also set up a LiteLLM proxy server to handle LLM requests. I will update this section in the future with more details.
Google ADK setup
ADK is a framework released by earlier in 2025 to help developers quickly build, test, and deploy generative AI agentic applications. You will see that with just a few lines of code, we can easily set up a chat assistant with it.
Let’s recap the project structure for the adk part:
├── adk/                     # Google ADK
│   ├── compose.yaml         # ADK container setup, TBD
│   ├── requirements.txt
│   └── chat_agent/          # Chat agent package
│       ├── __init__.py
│       └── agent.py         # Main agent code
For requirements.txt, we will need:
# adk/requirements.txt
google-adk
litellm
Use your favorite package manager to set up a virtual environment and install the dependencies.
Next in chat_agent/__init__.py, put in the line
from . import agent
Finally in chat_agent/agent.py, we have
from google.adk.agents import Agent
from google.adk.models.lite_llm import LiteLlm


root_agent = Agent(
    name='chat_agent',
    model=LiteLlm(
        model='ollama/gemma3:4b-it-q4_K_M',
        api_base='http://localhost:11434',
        stream=True,
    ),
    description='Chat agent',
    instruction="""
    You are a helpful assistant that helps answer the user's questions
    and perform tasks the user asks you to do.
    """,
)
That’it! Feel free to modify the instruction to change how the your chat
agent behaves.
Now we can run the agent with
adk web
This will start a dev web UI for the chat agent. If you now open your browser
and go to http://localhost:8000, your chat assistant is ready to answer
your questions! Use options --host and --port to change the host and port
as needed.
Here’s an example of how the chat UI looks like:
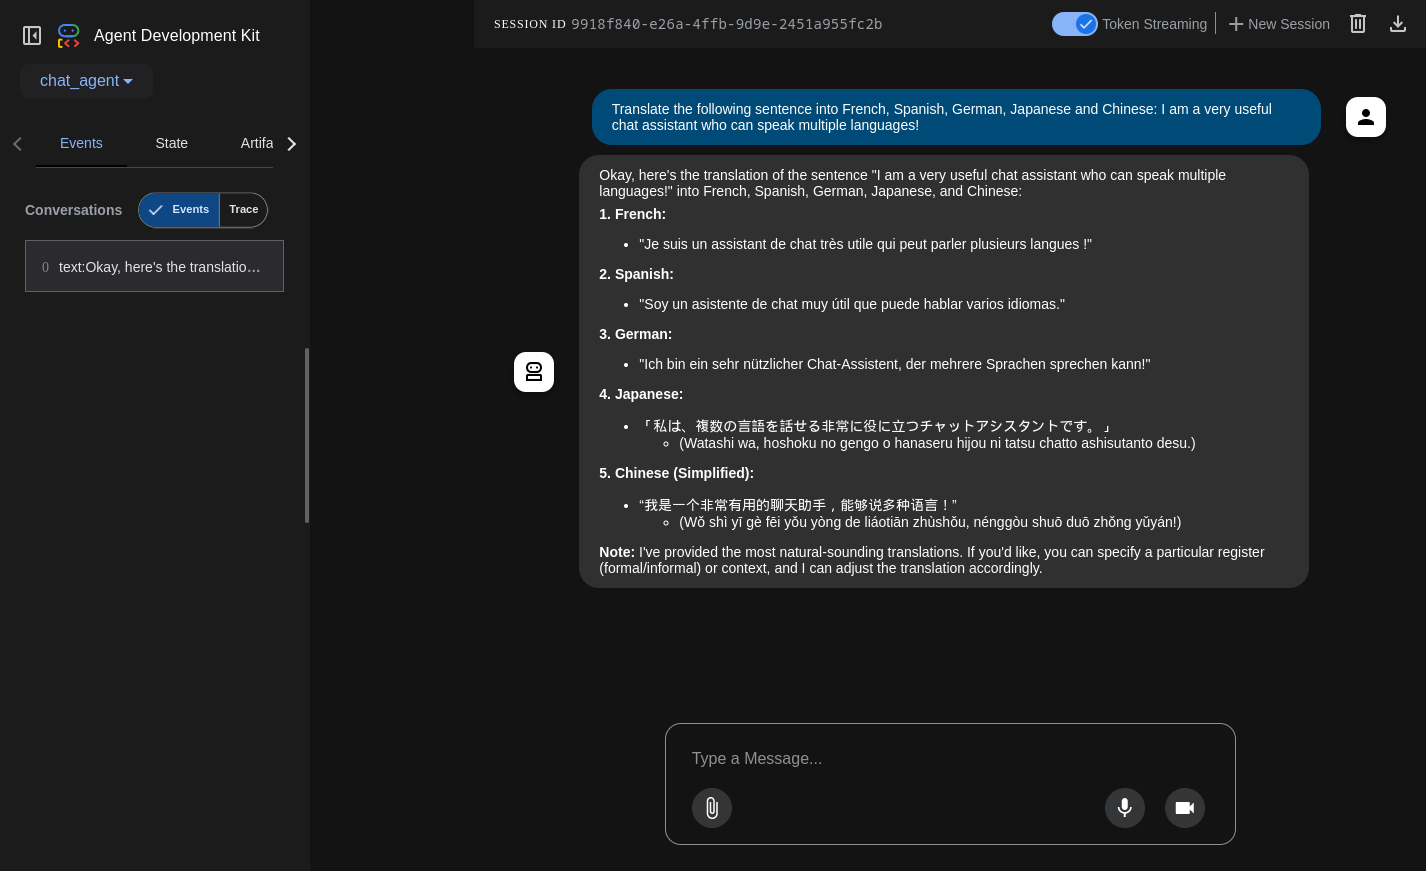
As you can see above the Gemma 3 model supports multiple languages (even though the pronunciation for Japanese and Chinese is not completely correct). It can also handle images as input.
Conclusion
As you can see, with just a few lines of code, we can set up a chat assistant with Ollama, LiteLLM, and Google ADK.
For production use, we would want to set up a LiteLLM proxy server to allow
secure access to our Ollama models. In addition, even though adk web starts
a web UI for the our chat assistant, for production, we would likely want a
custom web UI that fits specific use cases.